
モダンなデザインのログイン画面やユーザー登録フォームなどを実装したい場合、React Hook FormとMUIの組み合わせが候補の一つかと思います。今回はその方法、使い方について解説します。
React Hook Formとは?
React Hook Formは、Reactのライブラリの1つです。このライブラリを使用することで、フォームとそのバリデーションをシンプルかつ柔軟に実装できます。(以下、RHFと呼びます。)
(なお、バリデーションというのは、データが条件に合うかどうかを確認することです。メールアドレスの入力欄であれば、hoge@blog.comという形式になっているかどうかを確認するみたいな。)
MUIとは?
MUIもReactのライブラリの1つで、UIコンポーネントライブラリとも呼ばれます。MUIを使用することで、簡単に美しいUIを実装することができます。
実装の準備
フォームを作成する前に、諸々の準備をしましょう。
プロジェクトを作成
まず、適当なプロジェクトを作成します。
$ npx create-react-app react-lab --template typescript
ライブラリをインストール
続いて、作成したプロジェクトに移動して、ライブラリをインストールします。
$ cd react-lab

$ npm install react-hook-form

$ npm install @mui/material @emotion/react @emotion/styled
以下のコマンドでローカルサーバーを起動し...
$ npm start
http://localhost:3000/ にアクセスしてReactの画面が表示されればOKです!
フォームを実装
テキストフィールド、ラジオボタン、セレクトボックス、チェックボックスを実装し、ボタンをクリックでデータを確認します。
import { useForm } from 'react-hook-form'
import {
  Button, Checkbox, Container, FormControl, FormControlLabel, FormGroup, FormLabel, InputLabel, MenuItem, Radio, RadioGroup, Select, Stack, TextField
} from '@mui/material'

type formType = {
  name: string,
  gender: string,
  age: string,
  agreement: boolean
}

export default function App() {

  const { register, handleSubmit } = useForm<formType>()

  const submit = (data: formType) => {
    console.log(data)
  }

  return (
    <Container maxWidth="sm" sx={{ pt: 5 }}>
      <form onSubmit={handleSubmit(submit)}>
        <Stack spacing={3}>
          {/* TextField */}
          <TextField label="Name" {...register("name")} />

          {/* RadioButton */}
          <FormControl>
            <FormLabel>Gender</FormLabel>
            <RadioGroup row defaultValue={"male"}>
              <FormControlLabel value="male" control={<Radio {...register("gender")} />} label="Male" />
              <FormControlLabel value="female" control={<Radio {...register("gender")} />} label="Female" />
            </RadioGroup>
          </FormControl>

          {/* SelectBox */}
          <FormControl>
            <InputLabel>Age</InputLabel>
            <Select defaultValue={""} label="Age" {...register("age")}>
              <MenuItem value={""}><em>None</em></MenuItem>
              <MenuItem value={"10s"}>10~19</MenuItem>
              <MenuItem value={"20s"}>20~29</MenuItem>
              <MenuItem value={"30s"}>30~39</MenuItem>
            </Select>
          </FormControl>

          {/* CheckBox */}
          <FormGroup>
            <FormControlLabel control={<Checkbox {...register("agreement")} />} label="Agree to Terms and Conditions" />
          </FormGroup>

          <Button type="submit" color="primary" variant="contained">
            Submit
          </Button>
        </Stack>
      </form>
    </Container>
  )
}
以下、簡単にポイントを説明します。
// useFormからregister, handleSubmitを取り出す
const { register, handleSubmit } = useForm<formType>()

// 入力データがオブジェクトの形で取得できる
<form onSubmit={handleSubmit(submit)}></form>

// registerの引数がキーになる
<TextField label="Name" {...register("name")} />
ブラウザで確認
いい感じのフォームができました。
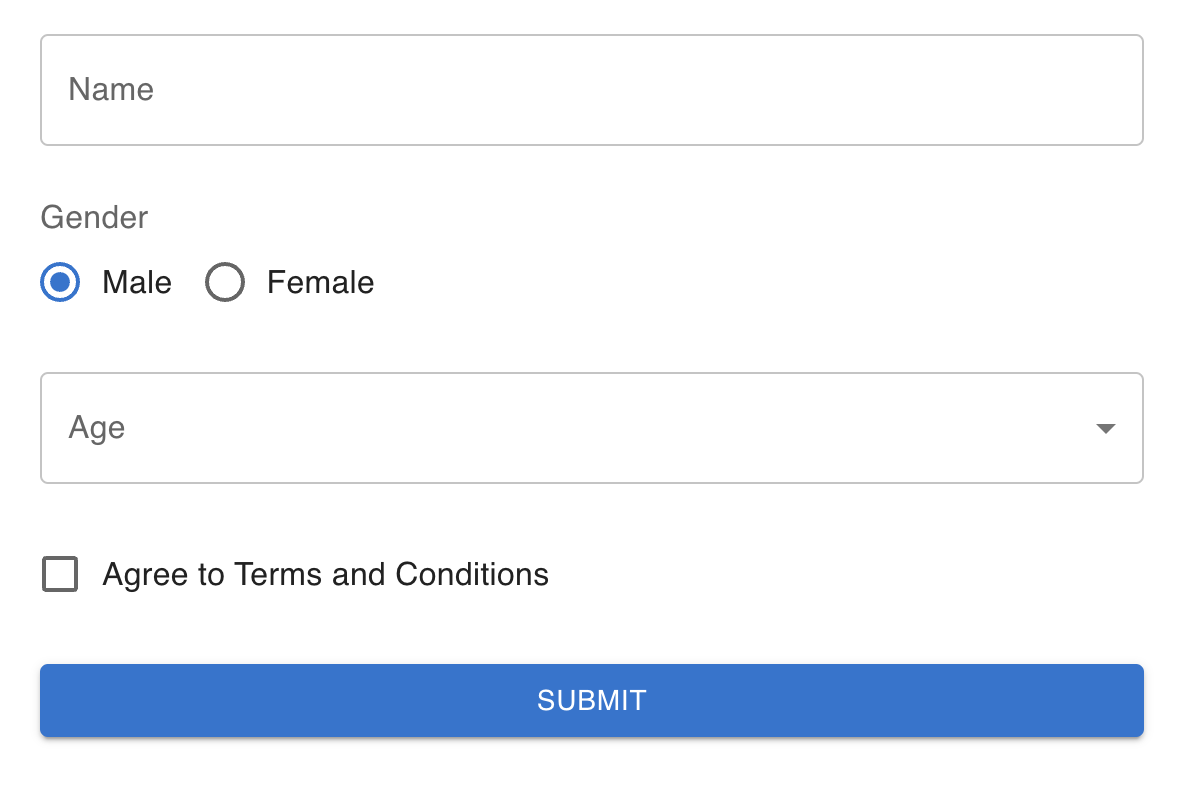
入力した値がそれぞれ取得できていますね。

MUIとRHFの連携の場合、<Controller>を使うべきか?
- RHFは非制御コンポーネント(uncontrolled)であり、registerを使うことで値を管理できる。
- MUIはTextFieldなど一部のコンポーネントは非制御だが、基本的には制御コンポーネント(controlled)なので、registerは使えず、<Controller>でラップすべき。
RHFとMUIを連携させる方法をブログやZennの記事で調べると、上記のように書かれていることが多いです。つまり、registerではなくControllerを使うべき、ということですね。
でも実際は、先のコードのようにラジオボタンやチェックボックスでもregisterを使うことは可能です。僕としては、registerが使えるなら使い、そうでなければ<Controller>を使うという方針で実装しています。
もし「MUIとRHFを連携させるなら、コンポーネントは必ず<Controller>を使用すべき。なぜなら~~」という知見をお持ちの方がいたら、ぜひご教授くださいませ。よろしくお願いします。
")